

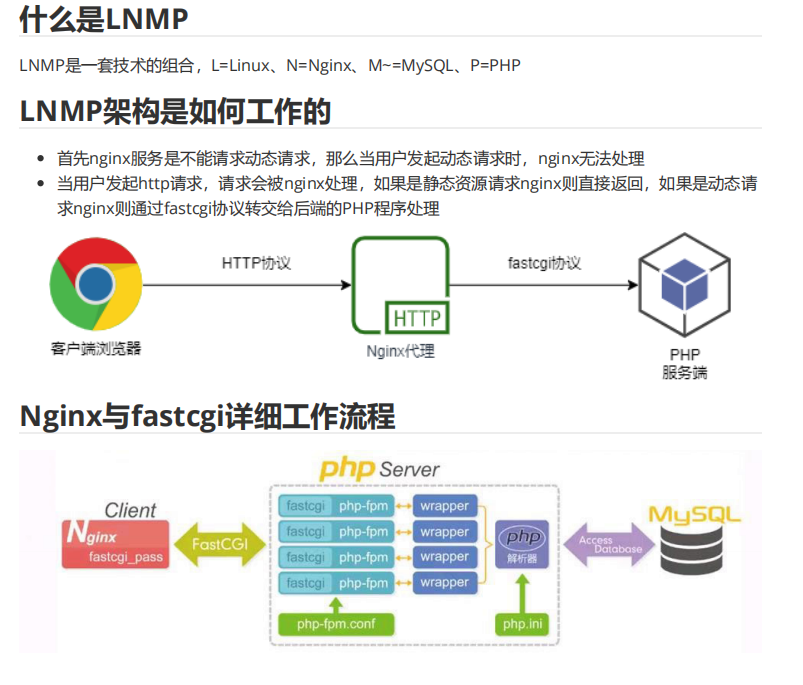
1. 用户通过http协议发起请求,请求会先抵达LNMP架构中的nginx;
2. nginx会根据用户的请求进行location规则匹配;
3. location如果匹配到请求是静态,则由nginx读取本地直接返回;
4. location如果匹配到请求是动态,则由nginx将请求转发给fastcgi协议;
5. fastcgi收到请求交给php-fpm管理进程,php-fpm管理进程接收到后会调用具体的工作进程
wrapper;
6. wrapper进程会调用PHP程序进行解析,如果只是解析代码,php直接返回;
7. 如果有查询数据库操作,则由php连接数据库(用户 密码 ip)发起查询的操作;
8. 最终数据由mysql-->php-->php-fpm-->fastcgi-->nginx-->http-->user
LNMP架构环境部署
使用官方仓库安装nginx
[root@localhost ~]# vim /etc/yum.repos.d/nginx.repo
[nginx]
name=nginx repo
baseurl=http://nginx.org/packages/centos/7/$basearch/
gpgcheck=0
enabled=1
[root@localhost ~]# yum -y install nginx
修改nginx用户
[root@localhost ~]# groupadd www -g 666
[root@localhost ~]# useradd www -u 666 -g 666 -s /sbin/nologin -M
[root@localhost ~]# sed -i '/^user/c user www;' /etc/nginx/nginx.conf
#将nginx.conf中的user用户名改为www
启动nginx并加入开机自启
[root@localhost ~]# systemctl start nginx
[root@localhost ~]# systemctl enable nginx
使用第三方扩展源安装php7.1
[root@localhost ~]# vim /etc/yum.repos.d/php.repo
[php]
name = php Repository
baseurl = http://repo.webtatic.com/yum/el7/x86_64/
gpgcheck = 0
[root@localhost ~]# yum install -y epel-release
[root@localhost ~]# yum -y install php71w php71w-cli php71w-common php71wdevel php71w-embedded php71w-gd php71w-mcrypt php71w-mbstring php71w-pdo
php71w-xml php71w-fpm php71w-mysqlnd php71w-opcache php71w-pecl-memcached
php71w-pecl-redis php71w-pecl-mongodb
配置php-fpm用户与nginx的运行用户保持一致
[root@localhost ~]# sed -i '/^user/c user = www' /etc/php-fpm.d/www.conf
[root@localhost ~]# sed -i '/^group/c user = www' /etc/php-fpm.d/www.conf
启动php-fpm并加入开机自启
[root@localhost ~]# systemctl start php-fpm
[root@localhost ~]# systemctl enable php-fpm
安装mariadb数据库
[root@localhost ~]# yum install mariadb-server mariadb -y
[root@localhost ~]# systemctl start mariadb
[root@localhost ~]# systemctl enable mariadb
[root@localhost ~]# mysqladmin password '123456'
[root@localhost ~]# mysql -uroot -p123456
Nginx连接Fastcgi服务器配置
[root@localhost ~]# vim /etc/nginx/conf.d/php.conf
server {
        listen 80;
        server_name php.test.com;  #修改自己电脑的hosts文件:网站ip  php.test.com
        root /code;   #主页位置,需要自己新建

        location / {
                index index.php index.html;
        }

        location ~ \.php$ {
                fastcgi_pass 127.0.0.1:9000;
                fastcgi_param SCRIPT_FILENAME $document_root$fastcgi_script_name;
                include fastcgi_params;
        }
}
[root@localhost ~]# nginx -t
[root@localhost ~]# systemctl restart nginx
测试Fastcgi是否正常
[root@localhost ~]# mkdir /code
[root@localhost ~]# vim /code/index.php
<?php
phpinfo();
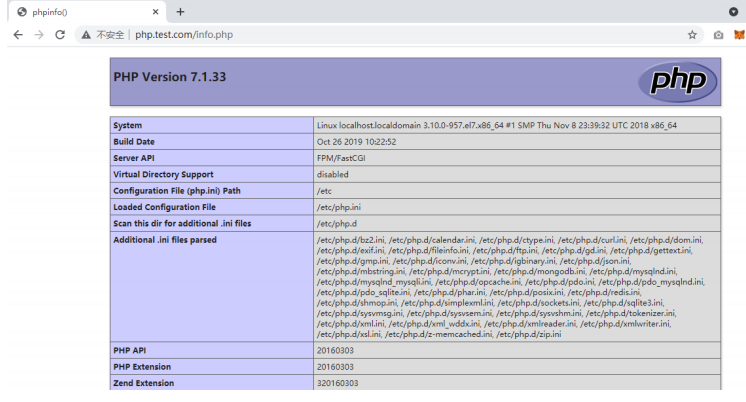
?>访问http://php.test.com/info.php
测试数据库连接
[root@localhost ~]# vim /code/mysqli.php
<?php
$servername = "localhost";
$username = "root";
$password = "123456";
// 创建连接
$conn = mysqli_connect($servername, $username, $password);
// 检测连接
if (!$conn) {
die("Connection failed: " . mysqli_connect_error());
}
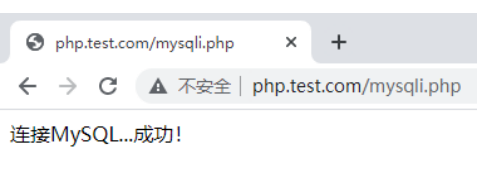
echo "连接MySQL...成功!";
?>访问http://php.test.com/mysqli.php
部署WordPress
配置Nginx虚拟主机站点
部署博客产品WordPress配置Nginx虚拟主机站点,域名为blog.test.com
[root@localhost ~]# vim /etc/nginx/conf.d/wordpress.conf
server {
        listen 80;
        server_name blog.test.com;    #修改自己电脑的hosts  IP地址  blog.test.com
        root /code/wordpress;
        index index.php index.html;

        location ~ \.php$ {
                root /code/wordpress;
                fastcgi_pass 127.0.0.1:9000;
                fastcgi_index index.php;
                fastcgi_param SCRIPT_FILENAME  $document_root$fastcgi_script_name;
                include fastcgi_params;
        }
}
[root@localhost code]# nginx -t
[root@localhost code]# systemctl restart nginx
下载wordpress源码
[root@localhost ~]# cd /code
[root@localhost code]# wget https://cn.wordpress.org/latest-zh_CN.tar.gz
[root@localhost code]# tar xzvf latest-zh_CN.tar.gz
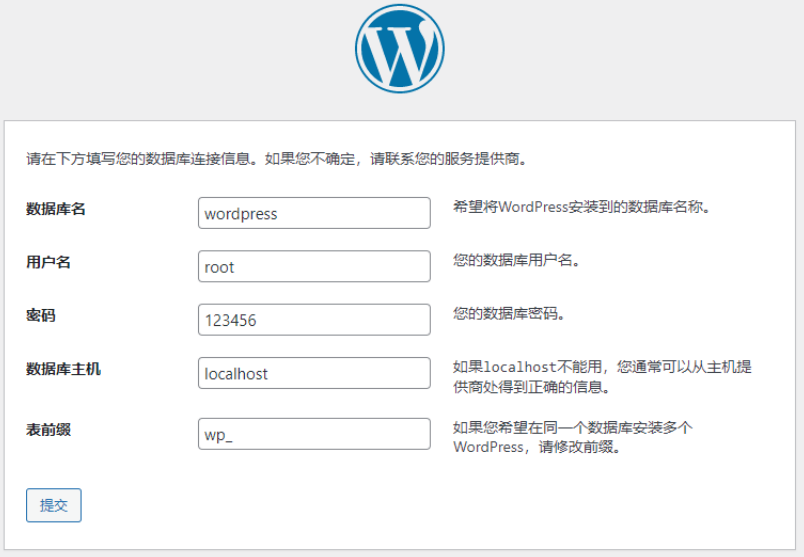
[root@localhost code]# chown -R www.www /code/wordpress创建所需数据库
[root@localhost ~]# mysql -uroot -p123456 -e "create database wordpress;show databases;"
+--------------------+
| Database |
+--------------------+
| information_schema |
| mysql |
| performance_schema |
| test |
| wordpress |
+--------------------+
配置wordpress

设置文件上传大小限制
解决nginx上传文件大小限制,413错误
[root@localhost ~]# vim /etc/nginx/conf.d/wordpress.conf
server {
        listen 80;
        server_name blog.test.com;
        root /code/wordpress;
        index index.php index.html;
        client_max_body_size 100m;

        location ~ \.php$ {
                root /code/wordpress;
                fastcgi_pass 127.0.0.1:9000;
                fastcgi_index index.php;
                fastcgi_param SCRIPT_FILENAME  $document_root$fastcgi_script_name;
                include fastcgi_params;
        }
}
[root@localhost ~]# nginx -t
[root@localhost ~]# systemctl restart nginx

还要解决php的文件大小限制
访问php.test.com/info.php
可以看到upload_max_filesize限制为2M
[root@localhost code]# vim /etc/php.ini
upload_max_filesize = 1000M
[root@localhost code]# systemctl restart php-fpm

发现还有post_max_size的限制
[root@localhost code]# vim /etc/php.ini
post_max_size = 800M
[root@localhost code]# systemctl restart php-fpm