

环境准备:六台节点
一台管理节点
- server1
一台nginx作为负载均衡器
- server2
两台apache作为web服务器
- server3
- server4
一台作为mariadb数据库
- server5
一台作为网站存储(nfs)
- server6
- 工作流程(主机清单文件、ssh通信、免密登录)
- 安装httpd、mariadb、nginx
- 使用模板给httpd准备配置文件,使用ansible-galaxy安装负载均衡角色
- 使用parted模块创建分区,使用lvg模块创建卷组,使用lvol模块创建逻辑卷,逻辑卷作为nfs存储使用
- 为数据库添加指定库、用户等操作
安装ansible(所有主机)
[root@server1 ~]# yum install -y epel-release.noarch
#安装拓展包
[root@server1 ~]# yum install -y ansible
在管理节点编写ansible主机清单文件
[root@server1 ~]# yum install -y ansible
[root@server1 ~]# vim /etc/ansible/hosts
[all_ip]
192.168.106.10
192.168.106.20
192.168.106.30
192.168.106.40
192.168.106.50
192.168.106.60

[all_hostname]
server2
server3
server4
server5
server6

[nginx]
server2

[apache]
server3
server4

[mariadb]
server5

[nfs]
server6
#生成密钥,分发密钥
[root@server1 ~]# ssh-keygen
[root@server1 .ssh]# for i in {1..6};do ssh-copy-id -i id_rsa.pub root@192.168.106.${i}0;done
PS:bash: ssh-copy-id: command not found的解决方法
yum -y install openssh-clients为所有主机生成hosts解析文件
[root@server1 ~]# mkdir playbook
[root@server1 ~]# mkdir template
[root@server1 playbook]# vim /root/template/hosts.j2
127.0.0.1   localhost localhost.localdomain localhost4 localhost4.localdomain4
::1         localhost localhost.localdomain localhost6 localhost6.localdomain6

{% for host in groups.all_ip %}
{{hostvars[host].ansible_ens33.ipv4.address}} {{hostvars[host].ansible_hostname}}
{% endfor %}
[root@server1 ~]# cd playbook
[root@server1 playbook]# vim hosts.yml
- name: Config hosts file
  hosts: all_ip
  remote_user: root

  tasks:
  - name: copy hosts.j2 to group servers
    template:
      src: /root/template/hosts.j2
      dest: /etc/hosts
[root@server1 playbook]# ansible-playbook hosts.yml
编写nginx、httpd、mariadb角色
编写yml安装nginx、httpd、mariadb并打开防火墙,设置防火墙放行服务
[root@server1 playbook]# ansible-galaxy init /etc/ansible/roles/apache
- Role /etc/ansible/roles/apache was created successfully
[root@server1 playbook]# ansible-galaxy init /etc/ansible/roles/nginx
- Role /etc/ansible/roles/nginx was created successfully
[root@server1 playbook]# ansible-galaxy init /etc/ansible/roles/mariadb
- Role /etc/ansible/roles/mariadb was created successfully
[root@server1 playbook]# ansible-galaxy init /etc/ansible/roles/nfs
- Role /etc/ansible/roles/nfs was created successfully
#初始化三个角色

#nginx
[root@server1 ~]# vim /etc/ansible/roles/nginx/tasks/main.yml
---
# tasks file for /etc/ansible/roles/nginx
- name: Yum install epel
  yum:
    name: epel-release.noarch
    state: present

- name: Yum install nginx
  yum:
    name: nginx
    state: present

- name: Start nginx
  service:
    name: nginx
    state: restarted
    enabled: yes

[root@server1 playbook]# vim nginx_install.yml
- name: Install nginx
  hosts: nginx
  roles:
  - nginx
[root@server1 playbook]# ansible-playbook nginx_install.yml

#apache
[root@server1 playbook]# vim /etc/ansible/roles/apache/tasks/main.yml
---
# tasks file for /etc/ansible/roles/apache
- name: Install lamp environment
  yum:
    name: httpd,php-fpm,php-mysql,mod_php
    state: present

- name: Start httpd
  service:
    name: httpd
    state: restarted

- name: Start php-fpm
  service:
    name: php-fpm
    state: restarted

[root@server1 playbook]# vim lamp_install.yml
- name: Prepare lamp
  hosts: apache
  roles:
  - apache
[root@server1 playbook]# ansible-playbook lamp_install.yml

#mariadb
[root@server1 playbook]# vim /etc/ansible/roles/mariadb/tasks/main.yml
---
# tasks file for /etc/ansible/roles/mariadb
- name: Yum install mariadb
  yum:
    name: mariadb-server
    state: present

- name: Start mariadb
  service:
    name: mariadb
    state: restarted

[root@server1 playbook]# vim mariadb_install.yml
- name: Install mariadb
  hosts: mariadb
  roles:
  - mariadb
[root@server1 playbook]# ansible-playbook mariadb_install.yml
准备负载均衡角色
#初始化角色
[root@server1 playbook]# ansible-galaxy init /etc/ansible/roles/nginx_lb
#准备配置文件模板
[root@server1 playbook]# vim /etc/ansible/roles/nginx_lb/templates/lb.conf.j2
upstream websers{
server server3;
server server4;
}
server{
listen 8080;
server_name 192.168.106.20:8080;
location / {
proxy_pass http://websers;
proxy_set_header HOST $host;
proxy_set_header X-Forwarded-Proto $scheme;
proxy_set_header X-Real-IP $remote_addr;
proxy_set_header X-Forwarded-For $proxy_add_x_forwarded_for;
}
}

#准备task文件
[root@server1 playbook]# vim /etc/ansible/roles/nginx_lb/tasks/main.yml
---
# tasks file for /etc/ansible/roles/nginx_lb
- name: Configure ngin LB conf file
  template:
    src: /etc/ansible/roles/nginx_lb/templates/lb.conf.j2
    dest: /etc/nginx/conf.d/lb.conf

- name: Restart nginx
  service:
    name: nginx
    state: restarted

[root@server1 playbook]# vim nginx_lb.yml
- name: Configure nginx lb server
  hosts: nginx
  roles:
  - nginx_lb
[root@server1 playbook]# ansible-playbook nginx_lb.yml
创建逻辑卷作为nfs存储使用
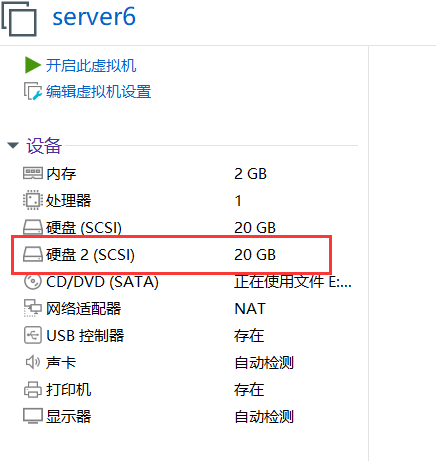
给server6添加新磁盘
[root@server1 playbook]# vim nfs.yaml
- name: create vg
  hosts: nfs
  tasks:
    - name: create partition
      parted:
        device: /dev/sdb
        number: 1
        flags: [ lvm ]
        state: present
        part_start: 1MiB
        part_end: 2GiB
    - name: create nfs vg
      lvg:
        vg: nfs
        pvs: /dev/sdb1
    - name: create lv
      block:
        - name: create lvm 1500m
          lvol:
            vg: nfs
            lv: data
            size: 1900m
      rescue:
        - name: file msg
          debug:
            msg: create lv failed
        - name: create lvm 800m
          lvol:
            vg: nfs
            lv: data
            size: 800m
      always:
        - name: format lvm
          filesystem:
            fstype: ext4
            dev: /dev/nfs/data
      when: "'nfs' in ansible_lvm.vgs"
    - name: nfs not exists
      debug:
        msg: vg does not exist
      when: "'nfs' not in ansible_lvm.vgs"

- name: install nfs pkg and mount nfs lvs
  hosts: nfs,apache
  tasks:
    - name: install package
      yum:
        name: nfs-utils,rpcbind
        state: latest
    - name: config file
      shell: mkdir /nfs | chmod  777 /nfs | echo "/nfs        192.168.106.0/24(rw,sync,no_root_squash)" > /etc/exports
    - name: start services
      service:
        name: "{{ item }}"
        state: restarted
      loop:
        - rpcbind
        - nfs-server

- name: mount lv
  hosts: nfs
  tasks:
    - name: mount lv
      mount:
        src: /dev/nfs/data
        path: /nfs
        fstype: ext4
        state: mounted
- name: mount apache
  hosts: apache
  tasks:
    - name: mount apache
      mount:
        src: 192.168.106.60:/nfs
        path: /var/www/html
        fstype: nfs
        state: mounted
[root@server1 playbook]# ansible-playbook nfs.yml
#此时apache的两台服务器就实现了共享存储,/var/www/html这个挂载在/nfs下共享web服务器的文件
[root@server3 ~]# df -h
[root@server3 ~]# echo "hello apache" >> /var/www/html/index.html
[root@server4 ~]# cat /var/www/html/index.html
hello apache
在nfs服务器nfs目录下下载typecho软件包并解压
[root@server3 nfs]# cd /var/www/html/
[root@server3 html]# wget http://typecho.org/downloads/1.1-17.10.30-release.tar.gz
[root@server3 html]# tar -zxvf 1.1-17.10.30-release.tar.gz
[root@server3 html]# mv build/* .
为数据库添加指定库、用户
[root@server5 ~]# mysql -uroot
MariaDB [(none)]> create database typecho;
MariaDB [(none)]> grant all privileges on typecho.* to user1@"%" identified by '123456';
MariaDB [(none)]> flush privileges;
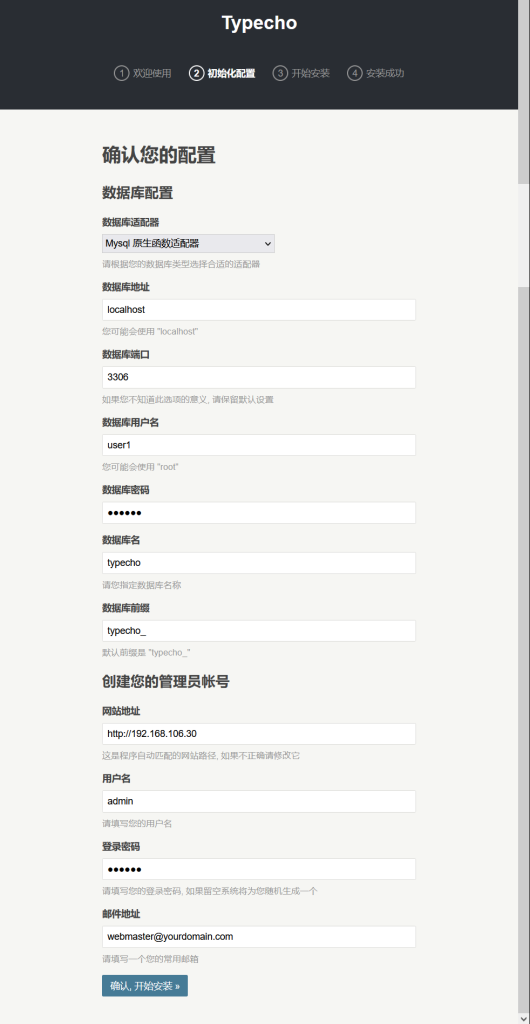
测试
最后网址访问nginx负载均衡服务器:192.168.106.20:8080(负载均衡不用80端口似乎会有bug,如果出问题就去访问192.168.106.30或者192.168.106.40)
Comments | NOTHING